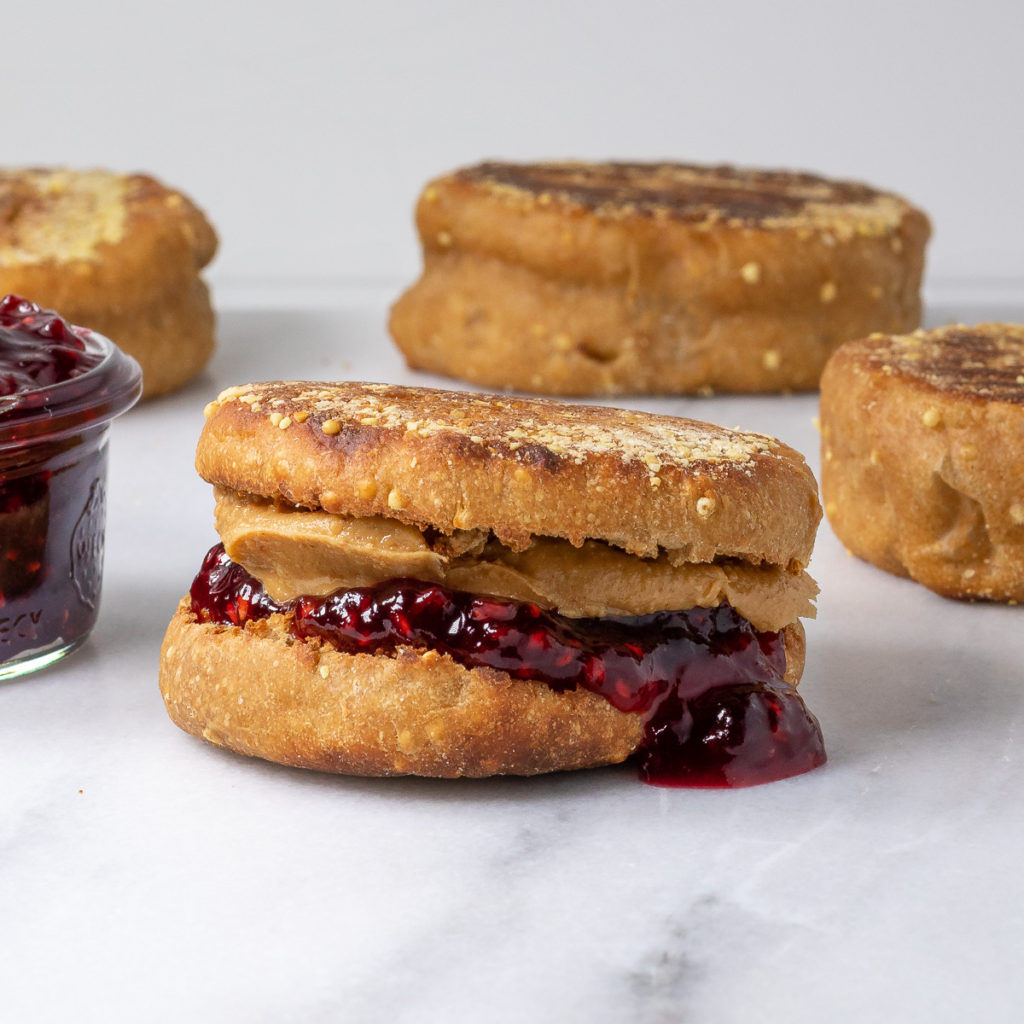
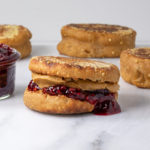
Homemade Hearty Grain English Muffins
This is a heartier grains upgrade on my previous homemade English muffin recipe. The muffins are wholesomely divine with all the best English muffin characteristics—firm crust, airy middle, fork-splitting seam, and that slightly sourdough-ish flavor ideal for sandwiching pb&j. I’ve loaded this recipe with a ton of helpful tips so you’re guaranteed a triumphant first attempt. Be sure to keep all surfaces coated in nonstick cooking spray as the dough is classically sticky (I’ll cue you on the critical spray moments below). Also, you’ll need a stand mixer with dough hook. Let the fun begin!
- 3 tsp. active dry yeast (not instant, about 1½ packets, see TIP A below)
- 1 tbsp. unsulphered molasses (not blackstrap, see TIP B below)
- 1 tbsp. good quality, pure honey
- 1/2 c. lukewarm water (not scalding or hot, see TIP C below)
- 2 tbsp. whole grain millet, lightly toasted in dry skillet
- 2 tbsp. unsalted butter, melted
- 1/2 c. plain whole milk yogurt (not Greek)
- 1 c. all-purpose flour (spoon into measuring cup)
- 1 c. stone-ground whole wheat flour (spoon into measuring cup, may also use spelt or buckwheat flour)
- 1 tsp. kosher salt
- 1/4 c. coarse or medium-ground cornmeal, divided
-
Whisk together the yeast, molasses, honey, and lukewarm water in the bowl of a stand mixer. Let sit for 15 minutes until the yeast fully dissolves and the mixture appears foggy and frothy.
-
Meanwhile, put the millet in a small, dry skillet over medium heat. Watch closely and shake the pan every 20-30 seconds until the millet becomes lightly toasted and fragrant (about 2-3 minutes). When done, immediately take the pan off the heat and let the millet cool.
-
Put the butter in a small microwave safe bowl and microwave on high for 20-30 seconds until just melted. Gently stir in the yogurt until fully combined.
-
Fit your stand mixer with a dough hook and add the cooled, toasted millet and butter-yogurt mixture to the bowl with the activated yeast mixture. Briefly mix. Then add the flours and salt and mix on low until the ingredients come together. Eventually, increase the speed of the mixer to medium/medium-high and knead the dough for a full 3-4 minutes (yes, that long!). You'll first see the dough soften and then it will begin to form cobweb-like strings around the dough hook. Keep kneading until the dough fully pulls away from the sides of the bowl and amasses around the dough hook. You'll know you're done when you hear the dough slap against the sides of the bowl. It will be soft and sticky, but relatively easy to remove from the dough hook in a single mass.
-
Turn the dough into a large bowl coated with nonstick cooking spray. Cover the bowl with plastic wrap and let sit at room temperature (or slightly above, see TIP D below) for 1.5-2 hours. The dough should double in size.
-
Line a large baking sheet with parchment paper and sprinkle half of the cornmeal over the parchment in an even layer (reserve the rest for later). Lightly spray your work surface (cutting board or countertop) with nonstick cooking spray. Turn the dough onto your work surface and cut it into 8 equal portions using a knife or bench scraper that has been coated in nonstick cooking spray. Working one at a time, gently shape the dough pieces into round-ish mounds about 2-2.5 inches in diameter. The dough will be sticky and soft so work quickly with your fingertips only (do not attempt to flatten or roll the dough with your palm). Transfer each mound to the prepared baking sheet leaving 1-2 inches space on all sides.
-
Lightly spray the tops of the dough mounds with nonstick cooking spray and cover the baking sheet with plastic wrap. Put the baking sheet in the refrigerator overnight (8-12 hours). Note: This step is mainly about giving the dough time to develop flavor and structure. The mounds may only rise slightly, but they should become more firm.
-
Approximately 30 minutes before you are ready to bake the muffins, remove the baking sheet from the refrigerator and let the dough come back to room temperature (keep covered in plastic wrap).
-
Pre-heat your oven to 350° and put a clean, empty baking sheet on the center rack. Meanwhile, bring a large skillet (preferably cast-iron) up to temperature over low heat on your stovetop. Note: It could take at least 5 minutes for the pan to fully heat. Lightly spray the skillet with nonstick cooking spray. Unwrap the dough mounds and coat the tops with the reserved cornmeal. Transfer a first batch of dough mounds (3-4) to the skillet using 2 flat spatulas that have been coated in nonstick cooking spray. Try not to squeeze or deflate the dough during this process; handle carefully and use the spatulas to get under the dough mounds from both sides. Let them cook on the first side undisturbed for 5-7 minutes until the bottoms turn deep brown in color. Then flip and allow the same thing to happen on the second side. Once browned on both sides, transfer the English muffins to the baking sheet in the oven for another 5-7 minutes. Repeat this process with remaining dough mounds. Let the finished English muffins cool on a wire rack for 20-30 minutes before splitting with a fork to eat (see TIP E below). Enjoy toasted or un-toasted. Store cool muffins in a ziplock bag in the fridge for up to 1 week or in the freezer for up to 1 month.
TIP A: As indicated above, you want to use active dry yeast for this recipe, not instant or fast-rising. Yeast often comes in 7 gram sachets and is sold in packs of three in the baking section (you'll need 1.5 sachets for this recipe). Yeast loses its "oomph" over time, so I recommend buying fresh and tossing any old stuff that you might come across in your pantry. Trust me.
TIP B: Pure, unsulphered molasses adds great depth of flavor and sweetness to these English muffins. It's often the "secret ingredient" in your favorite whole-grain or seeded-grain breads because it adds depth of color and flavor. If you can't find unsulphered molasses (or simply forgot to pick it up at the store), then substitute an additional tablespoon of honey. Do not use blackstrap molasses—it is a different ingredient entirely. Blackstrap molasses is more bitter than sweet and is mostly used for home remedies vs. baking.
TIP C: Temperatures above 130° will kill yeast and temps below 40° will cause it to go dormant. The ideal temperature of water to activate yeast is around 100-110° (or moderately warm from the tap). Similarly, you want all other ingredients that get added to the yeast (butter-yogurt mixture, flour, etc.) to be at room temperature or slightly above. Ingredients that are too cold (i.e. straight from the fridge) or too hot (i.e. boiling) run the risk of killing the yeast.
TIP D: If your house runs cool or you struggle to find that slightly warm spot, put the dough in a cool oven (turned off) with the lamp on. The slight heat of the lamp and draft-free environment is perfect for fermenting dough.
TIP E: English muffins are traditionally "fork split" to preserve the nooks and crannies (according to Thomas'®) and to create an uneven surface for optimal toasting. It involves poking the center seam around the perimeter of the English muffin with a fork to loosen the two halves. Then, use your fingers (not a knife) to pull the two halves apart.